

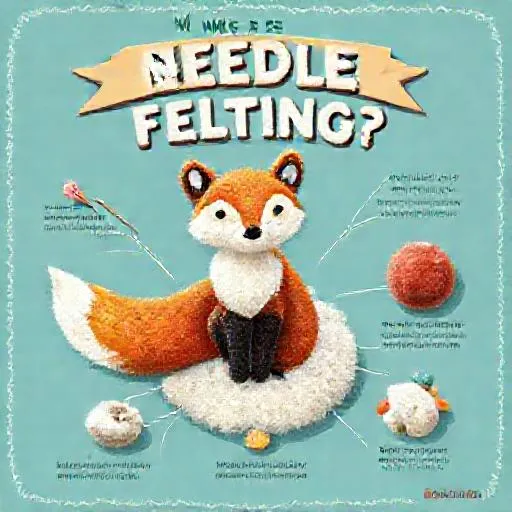
Needle felting expla
What Is Needle Felting, Exactly?
If you've ever scrolled through your feed and stopped dead at a video of someone jabbing a fluffy ball of wool with a scary-looking needle until it magically turns into a tiny fox, you've already brushed up against the world of needle felting. So let's break it down properly. This needle felting guide starts with the core idea: needle felting is a dry-felting technique where you use a special barbed needle to tangle and interlock wool fibers. Unlike wet felting, which relies on water and soap, this method depends purely on friction. The tiny barbs on the needle catch individual fibers and push them deeper into the mass, causing them to mat together. The more you poke, the denser and firmer your shape becomes. That's the whole magic trick — friction, patience, and a whole lot of stabbing.
The real beauty of this craft, as any good needle felting guide will tell you, is its simplicity. You need very few tools to get started, and the learning curve is gentle. Within an hour, most beginners can produce a small, recognizable shape. Within a weekend, you might be making full sculpted figures. It's one of those rare hobbies where the gap between "I've never tried this" and "look what I made" is shockingly small.
Why Needle Felting and Wool Craft Are Booming in 2026
Several factors have pushed needle felting into the mainstream this year, and honestly, they all make sense:
- Mindfulness and slow crafting: People are seeking hands-on hobbies that reduce screen time and promote focus. There's something deeply calming about repetitive motion.
- Low startup cost: A basic kit costs less than a dinner out. Compare that to, say, pottery or weaving, and it's a steal.
- Social media appeal: Short-form video platforms love the satisfying, repetitive motion of felting. Those "poke, poke, poke" clips rack up millions of views.
- Sustainability: Wool is a natural, renewable material, which appeals to eco-conscious crafters who want to work with something biodegradable.
- Gift potential: Handmade felted items make personal, memorable presents that don't look like they came off a factory line.
Essential Felting Needles, Wool Roving, and Supplies for New Crafters
Before you dive in, let's talk about what you actually need. You don't have to buy everything at once, but starting with quality basics will save you frustration. Every solid needle felting guide hammers this point home, so we will too.
Understanding Felting Needles, Gauges, and Ergonomics
Felting needles come in different gauges. The lower the number, the coarser the needle. A 36-gauge needle is great for initial shaping, while a 40-gauge is better for fine details. Many crafters keep a few sizes on hand. Some needles come in ergonomic handles, which reduce hand fatigue during long sessions. If you're planning marathon crafting sessions, that grip matters more than you'd think.
Choosing Wool Roving, Batting, and Fiber Blends
Not all wool is created equal. For needle felting, you want clean, carded wool roving. Merino is soft and popular, but corriedale holds shape well and is more affordable for practice. Avoid wool that's too oily or full of vegetable matter — it'll slow you down and gum up your needle. A trustworthy needle felting guide will always tell you that fiber choice is half the battle.
Foam Pads, Brush Mats, and Safe Work Surfaces
You need a work surface that the needle can pass into without breaking. A thick foam pad or a bristle brush mat works perfectly. Replace foam pads when they get too chewed up, or your needle will start snapping. Trust me, broken needles are the fastest way to kill your crafting buzz.
Scissors, Finger Guards, Tweezers, and Other Handy Tools
- Small scissors for trimming fuzz
- Thimble or finger guards (yes, you will poke yourself — everyone does)
- Tweezers for placing tiny details
- Wire armature for poseable figures
- Seed beads or embroidery floss for eyes and accents
Step-by-Step Needle Felting Guide: Your First Project From Wool to Shape
Let's make a simple felted ball that you can later turn into an animal head, a bead, or a decorative ornament. This is the foundation of almost every needle felting project, and any needle felting guide worth its salt starts right here.
Step 1: Preparing Wool Roving by Tearing and Fluffing Fibers
Pull off a tuft of wool roving. Don't cut it — tearing keeps the fibers long and makes them felt better. Fluff it up with your fingers.
Step 2: Poking Technique, Needle Angle, and Fiber Interlocking
Place the wool on your foam pad. Take your needle and poke it repeatedly into the wool, rotating the mass as you go. Keep your needle straight up and down to avoid bending it. You'll notice the wool starting to compact.
Step 3: Shaping, Refining, and Smoothing Your Felted Form
As the ball firms up, use your fingers to pinch it into a rounder shape. Continue poking. If you want a smoother surface, switch to a finer needle and poke lightly all over.
Step 4: Adding Color, Details, and Facial Features With Fine Needles
To add a different color, lay a small tuft over the base and poke it in. For eyes or nose, use tiny amounts of wool and a fine needle. This is where your project comes to life.
Step 5: Finishing, Firming Up, and Trimming Stray Fibers
Once you're happy with the shape, do a final round of firm poking. Trim any stray fibers with scissors. Your first felted object is done!
Common Beginner Mistakes in Needle Felting and How to Avoid Them
Even with a great needle felting guide, people trip up on the same things. Here's how to sidestep them:
- Poking too shallow: You need to push the needle deep enough to tangle the core fibers.
- Using too much wool at once: Start small and add layers. It's easier to add than subtract.
- Working on a hard surface: Always use a foam pad or brush mat.
- Ignoring needle direction: Angled poking can snap needles.
- Rushing the details: Fine work takes time and a light touch.
Intermediate Needle Felting Techniques: Wire Armatures and Color Blending
Once you've mastered basic shapes, you can explore more advanced methods that add realism, texture, and durability. A more advanced needle felting guide will introduce these next-level skills.
Building Poseable Figures With Wire Armatures and Sculpting Wool
For figures that stand, bend, or hold a pose, you'll want a wire armature. Twist together crafting wire to form a skeleton, then felt wool around it. This is how most poseable animal figures are made.
Blending Wool Colors for Gradients, Marbled Effects, and Custom Shades
You can blend two or more wool colors by teasing them together before felting. This creates gradients, marbled effects, or custom shades that aren't available pre-dyed.
Adding Prefelt, Fabric Sheets, and Flat Felting for Structure
Some crafters incorporate small pieces of prefelt or fabric sheets into their projects for extra structure. This is common in flat felting or when making patches.
Sculpting Faces, Expressions, and Tiny Details With Fine Needles
Facial features are the hardest part for most people. The trick is to build up tiny amounts of wool slowly, using reference photos. A slightly asymmetric expression often looks more natural than a perfectly symmetrical one.
Needle Felting Projects: Miniature Animals, Jewelry, Decor, and Wall Art
The same core technique can produce wildly different results depending on your goal. Here are some popular categories:
- Miniature animals: Mice, foxes, birds, and pets are perennial favorites.
- Jewelry: Felted beads, brooches, and pendants.
- Home decor: Wreaths, garlands, and small sculptures.
- Toys: Simple felted balls for pets or children (supervise kids and pets).
- 2D wall art: Flat felting onto fabric or felt sheets to create pictures.
Caring for Needle Felted Creations: Cleaning, Storage, and Repairs
Needle felted items are durable but not indestructible. Here's how to keep them looking good, and any thorough needle felting guide should cover this stuff:
- Keep them away from pets who might chew or swallow small parts.
- Dust gently with a soft brush or compressed air.
- Spot clean with a damp cloth if needed. Avoid soaking.
- Store in a dry place. Moisture can encourage mold in natural wool.
- If fibers loosen over time, just poke them back in with a needle.
Where to Learn More: Tutorials, Workshops, and Fiber Shops
The needle felting community is generous and beginner-friendly. You can find tutorials on video platforms, join online crafting forums, or check out local workshops at community centers and craft stores. Many libraries also carry introductory craft books. If you're looking to buy supplies, a well-known craft retailer or an independent fiber shop will usually have starter kits. Avoid ultra-cheap needles — they break easily and can ruin your experience. A mid-range kit from a reputable supplier is worth the small extra cost.
SEO and Content Tips for Felting Creators Sharing Projects Online
If you're making felted art and want to share it online, a little SEO knowledge goes a long way. Think of it as a needle felting guide for the internet side of your hobby.
Instead of "My New Project," try "Needle Felted Red Fox Miniature — Beginner-Friendly Tutorial." Rename your image files with relevant keywords before uploading, and add alt text that describes the content. Short descriptions that explain your process, materials, or inspiration keep viewers engaged and signal relevance to search algorithms. Phrases like "needle felting guide for beginners," "how to felt a small animal," or "best wool for needle felting" have less competition and attract highly motivated readers. Use clear headings, bullet points, and short paragraphs — this improves readability and helps search engines understand your page structure.